Deleted
Deleted Member
Posts: 0
|
Post by Deleted on Jun 30, 2012 7:55:18 GMT -8
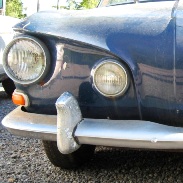
Wow John.... I haven't been here for ages, what with running my own forum and all, but I can say that I am truly impressed with your skills.... I'm trying to figure out how to pull a couple of creases out of the high ridge edge on the front end, and the rear panel on my car..... You put me to shame.... So looking forward to what you do next.
|
|
|
|
Post by John Kanters on Jul 7, 2012 15:15:18 GMT -8
With my other mini project almost complete I had a few spare hours left in the day for the rustbucket, the next logical step is the left side rocker and fender bottoms which is pretty much repeating what I've already done so not as exciting I'm afraid but I'll try to take some pictures of the different steps needed to make these panels. The good part of this is that once done the rust repairs will be about 75% done on the body Its been about a month since I last drilled out spot welds and to be honest its easy to forget as it really isn't a lot of fun however its got to be done! Started out on the rear fender behind the door and split that apart from the body so the outer skin could come off followed by the lower piece on the front fender leaving the complete rocker exposed which will be cut off next. Nice previous repair uncovered which was just a generous dollop of bondo to "fix" that rust hole :roll: :roll: I'm actualy amazed I haven't uncovered a bunch of these types of repairs which just goes to show that the car hasn't been molested too much in its lifetime. I'll get the rocker cut off next week so then no doubt more blasting will be required, same rust holes as the other side and pretty much as bad if not worse.    |
|
|
|
Post by John Kanters on Jul 14, 2012 22:02:28 GMT -8
Yeeeeeaap here we go again and the rust saga continues, cut off the other rocker yesterday and this side has the wiring tube running through it to the rear in some parts its worse and others not as bad as the other side but overall it will still need everything replaced. I'm really glad that I'm opening all of this up as I'd be gutted if it poxed out with rust again once its painted, at least this way its going to last for a very very long time. Once the outer panel was off it was a matter of cutting all the other bits off around the A pillar and I quickly realized that it would be better to pull the wiring out as well but the problem with that was the plastic conduit had gone as hard as concrete over the years so where it bent 90 deg upwards you just couldn't pull it through the tube so I decided to remove the tube all together to make repairs and blasting a lot easier at the same time the wiring could be pulled out.  Later on I'll replace all of the flexible conduit over the wiring making installation easy again once the body is painted, the tube it runs though is ok but again easier to bend up a new one rather than sandblast and paint this one. The weather is whats going to hold me up now since this whole side needs blasting and priming but I'll make a start on the new panels for now and see where that takes me. Less interesting doing stuff I've already done but at least it will be easier and in theory quicker this time round.   Also been thinking about other parts of the car and I'm going to have a go at making my own dash pads, mine are all there but in bad shape like most so new ones is the only thing I'll be happy with. Its not something thats going to happen this year but I do intend on making new ones, will start doing some homework on what materials I need. |
|
|
|
Post by John Kanters on Jul 21, 2012 1:15:11 GMT -8
Went and got another sheet of electrogalv last week, still find it hard to believe there's an entire 1200x2400 sheet in that bodyshell already  .....................but there is ;D Even the guy at the sheetmetal place said.......wow it must be a rusty car  , yes mate Karmann built the best rustbuckets in the business!  Started making the outer rocker panel last week so this morning that was the logical place to carry on, faffed around quite a bit shaping the step on the die I made so once happy with that I used the shrinking disc to shrink the excess metal back flush again. Tried this new technique on this side hoping it would be quicker but it turned out to take just as long however its probably come out a little nicer than the other side.  Done with that the day was rolling on so I got a little more serious and started folding the lower lip with the tipping dies in the bead roller. This beadroller has really been one of the best tools one can have for sheetmetal fab, some of the stuff I've made just wouldn't have come out half as nice otherwise. Placed the skin on and held in place with vise grips.   Before I could carry on with the 2nd section of the rocker I'd first have to repair the completely rotten rear inner fender corner as the rocker end welds to it at that point. Cut the rusted sections away there really wasn't much left to look at or to get an idea of what its supposed to look like so I did the best I could looking at the repaired side for measurements.  Surprisingly this piece took ages to make, most of the afternoon infact and its mainly due to its fairly complex shape with metal curving in a few directions. Probably would have been loads easier making it out of 2-3 pieces but that's no fun is it   Last job of the day I made the rear part of the rocker, walk in the park compared to the rear corner and whipped that up in 20 min.  Weather is still too iffy for blasting so I'll move on to making the required pieces for the front corner next. |
|
|
|
Post by Franck Boutier on Jul 21, 2012 4:24:53 GMT -8
Hello John ,
Great job you're doing !
Franck.
|
|
|
|
Post by John Kanters on Aug 4, 2012 1:07:20 GMT -8
Back on the Ghia this morning, the wet weather has really slowed me down (dunno why as there's HEAPS of other stuff to do :  I tend to get bogged down wanting to finish the one particular thing I'm working on but since the rain hasn't really let up I had to reluctantly move on. Pretty much have all the pieces made for the left side rocker which has to be blasted and primed now before I can weld it back together. Decided that tackling the major rust in the nose was the next most difficult area to repair so after carefully assesing what to do I marked the lines to be cut, problem being I had to pretty much take it apart layer by layer (even though its all rotten) so that I have at least something left to measure and copy as well as figure out what it looked like when new.  Its amazing how 2 bits of metal rotten as a pear stay firmly together by a spotweld even tough everything around it is rusty. With the outer skin off the inner frame is revealed, at least whats left of it.  I supported the body up side down on jack stands to take the weight off the bumper mounts because I don't want anything weird happening when I cut more metal away around that area. Pretty much all of the weight hangs from the bumper mounts when the body is in the rotisserie. Again trying to save what was left all took time but with that out of the way I cut off the bottom of the lower wheel houses and made new sections for those areas to be welded in place. At this point the spare wheel well (also rusty and dented  ) was bolted back in to make sure that everything fits nice and lines up. Finished up welding in the left lower panels at this point, quite awkward place to get at with a grinder and air saw but it looks pretty good now.   Other side was quite a bit quicker and a little less rusty so that got finished up before the end of the day, next job will be making a new support rail for the bottom of the tyre well and then a new lower outer skin to finish off with.   Sometimes I do look at it and laugh thinking WHY am I fixing this old piece of crap but take one look at the lines of the body it all makes sense again...........and because I can  |
|
|
|
Post by Jürgen Klein on Aug 4, 2012 6:25:39 GMT -8
Sometimes I do look at it and laugh thinking WHY am I fixing this old piece of crap but take one look at the lines of the body it all makes sense again...........and because I can That`s it ! Go on with your great work and please post on such good pics as above ...! |
|
|
|
Post by Lee Hedges on Aug 4, 2012 8:22:15 GMT -8
John, your fabrication work is a thing of beauty ... and your commentary makes us all enjoy being there beside you with a cold beer watching in amazement!
|
|
|
|
Post by John Kanters on Aug 4, 2012 14:50:11 GMT -8
Cheers fellas, the work shall continue next week.
|
|
|
|
Post by John Kanters on Aug 11, 2012 14:27:41 GMT -8
Carried on with repairing the lower nose this morning which is probably the last really "difficult" area to repair on the body, finishing this will complete all the major rust with just small patches to do here, there and everywhere  Thankfully Jurgen Klein emailed me some pictures and outline drawing of an NOS one he used for his car which made things a little easier. The lower support rail for the spare wheel pan is a reasonably complicated thing to make, I suppose there's other ways to do it by taking short cuts but I'm not really interested in doing that after all I'm learning how to do metalwork and the different techniques it takes. Started out folding some sheetmetal in to a U shape and using the stretcher to form a curve in the channel that follows the wheel tub. With that done the ends need to go the other way so swapped the jaws over to shrinkers and used those to pull the ends around, found I had to fold to a 75 deg angle instead of a 90 otherwise it wouldn't fit in the jaws.   Drilled the holes for the captive nuts and bolted it on the wheel well..............after a lot of fiddling  With it sitting pretty good it needed an extra angled strip for the seal to be held captive so again a strip of sheetmetal folded to a 90 curved to the right shape in the shrinker and welded it on.   Now the tricky part, figuring out what curvature this panel had originally as its got to match the lower nose skin.....................which is rusted / cut away. After a bit of contemplation, guesswork & looking at Jurgens pictures again I came up with something that looked to be OK so trimmed the panel down and folded the edges over. Most of it came out pretty good with a couple of areas that needed to be adjusted, welded it on the body at this point which made me feel pretty good knowing another major part was done.   Seeing as I was on a bit of a roll and things were going well ;D I thought I'd have a go at making the lower nose skin but the one piece of 1.0mm steel I had was too short, not wanting to quit now I just welded another bit on! The lower part of the nose curves both ways and has sort of a trough in the centre, the english wheel really is the only way to make this part of it so wheeling a curve into the panel you quickly begin to see it taking shape but as with everything the last 10% takes 90% of the time.  Its really starting to take shape at this point and also rolled the swage lines in. After several more hours of fine tuning it was getting pretty late in the day but I'm 95% there with the skin and it seems to fit really nice so far. Finished the day fitting it in place properly with panel clamps so get a more accurate idea of whats what.   |
|
|
|
Post by John Kanters on Aug 25, 2012 0:55:01 GMT -8
I admit defeat!  Going to get the front half of the body blasted, the weather really has conspired against me the last 3-4 months so rather than waste more time waiting for better days the body is off to the blasters to strip all the paint and rust off the front half. Still feel pretty good I was able to do half the body but I really want to crack on and get all the metalwork completed so that I can start fitting and gapping the panels. Today's job became scaping / chipping all the underseal off the body and also removing all the rubber gaskets in the front as well as the seam sealer etc from all the panel joins. The fenders and light buckets are in relly good shape as are those funny little boxes near the windshield posts. Probably the reason why is that my car doesn't seem to have the drain holes from the hood seal area which leads in to those boxes so I'm just gonna leave them in place and seal over them once blasted and epoxied.  I'm guessin that antenna hole isn't factory? just looks like someone hacked that in there.......... Where do T34's normally have their antenna from factory?  Also cut out both front trunk corners, seems an odd place for rust but then I could say that about lots of rust I've found so far Anyways its just more metal to replace, I hope to be at the point where all rust repairs are done within the next 2 months at which time I'll drag the floor pan out for a change of scenery  |
|
|
|
Post by John Kanters on Sept 7, 2012 0:10:15 GMT -8
Well we're back on track, body delivered at lunch all clean and primed...........the weather can get stuffed now for all I care!   Lots to do and quite a few more holes found, some parts look like swiss cheese but the important areas are fine. Soo much nicer having it all clean and de rusted, stayed behind tonight and got on with some welding. Filled some small holes in the inner heater channel plate and welding on the rear lower fender as well as the wiring tube and front heater outlet pipe. All these parts I made a while ago so it was real easy just placing them and welding it together, once that was done and seam sealed I re primed the inner rocker so that it will be dry tomorow for me to weld the outer skin on.    Blasting also uncovered this mess, this is a typical repair I see all too often on cars which have come from America  drill holes, dent pull and bondo it up.............I mean WTF??? Just a joke, obviously not capable of anything else.....................will probably cut that whole area out and make a new panel. What makes it even more stupid is the fact you can get at all the damage easily from behind so why drill a bunch of holes and make a mess out of it?  |
|
|
|
Post by John Kanters on Sept 8, 2012 15:54:39 GMT -8
Had a hugely successfull day on the body yesterday just carrying on from Friday, and with the epoxy now dry enough I got to work attaching the outer rocker skin. A bit of last minute trimming and welding could begin, again just taking time to not heat the area too much it took more than half the day to get this section finished and ground up. Certainly changes ones perspective once big parts of the body get completed so onwards we go. I do ask myself sometimes though what is it about us car guys that we look at an old pile like this and think yeah yeah I could fix that :roll: :lol:   With that out of the way I carried on with one of the swiss cheese areas found from blasting, best thing was just to cut it all away and start a fresh with all new metal. Made the new pieces just like the factory did also with a strengthening plate behind the captive bolt. Got all the pieces done and double checked them holding them in place with vise grips, last thing for the day I welded the aprts in and ground everything up......rust gone! I'm going to try and get back to doing an hour or so after work each day to try and get on top of the rust work in the body but we'll see how that goes.     |
|
Kharon
Pro
 VWs: '61 typ2, '63 typ 14, '65 typ34, '74 412 & -75 typ261 Also other cars & bikes.
Posts: 77
|
Post by Kharon on Sept 9, 2012 9:24:09 GMT -8
"I do ask myself sometimes though what is it about us car guys that we look at an old pile like this and think yeah yeah I could fix that :roll: :lol: " This one easy: Because you can! I sure wish I could too. But I can say that once you've repaired as bad T34 as this, most other cars seem very simple to fix. "Karmann built the best rustbuckets in the business! " This applies not only to VWs, but BMWs too: The old 6-series (E24) was build by Karmann and it's the only BMW which has serious rusting problems. Obviously Karmann didn't do anything to protect the cars it built, even the paint is missing whenever possible. |
|
|
|
Post by bobnotch on Sept 10, 2012 4:58:20 GMT -8
"I do ask myself sometimes though what is it about us car guys that we look at an old pile like this and think yeah yeah I could fix that :roll: :lol: " This one easy: Because you can! I sure wish I could too. But I can say that once you've repaired as bad T34 as this, most other cars seem very simple to fix. "Karmann built the best rustbuckets in the business! " This applies not only to VWs, but BMWs too: The old 6-series (E24) was build by Karmann and it's the only BMW which has serious rusting problems. Obviously Karmann didn't do anything to protect the cars it built, even the paint is missing whenever possible. I have to agree with you there. I've worked on quite a few vehicles over the years (I live in the "rust belt" in the USA), but I've never seen a car rust in such odd places as my T-34 did. I keep telling John, that he's hit almost all of the same places I did with my own car. Keep up the good work John, pretty soon you'll be able to build a complete T-34 without actually having one. ;D |
|

 .....................but there is ;D
 , yes mate Karmann built the best rustbuckets in the business!


 I tend to get bogged down wanting to finish the one particular thing I'm working on but since the rain hasn't really let up I had to reluctantly move on.
 ) was bolted back in to make sure that everything fits nice and lines up.


 drill holes, dent pull and bondo it up.............I mean WTF???