|
|
Post by Lee Hedges on Jul 6, 2013 3:49:03 GMT -8
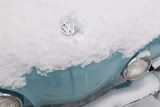
The 1968 came with solid black interior on a solid Lotus White body, not the most eye-catching combination. The seat upholstery was deteriorating, the door panels were falling apart, and the wood dash covering was cracked in a hundred places. I checked-out the 1968 sales brochure (below) to see what options were available in 1968 and the herringbone cloth inserts (white & black check material) was the nicest option, brightening the T34 interior and giving it more elegance. 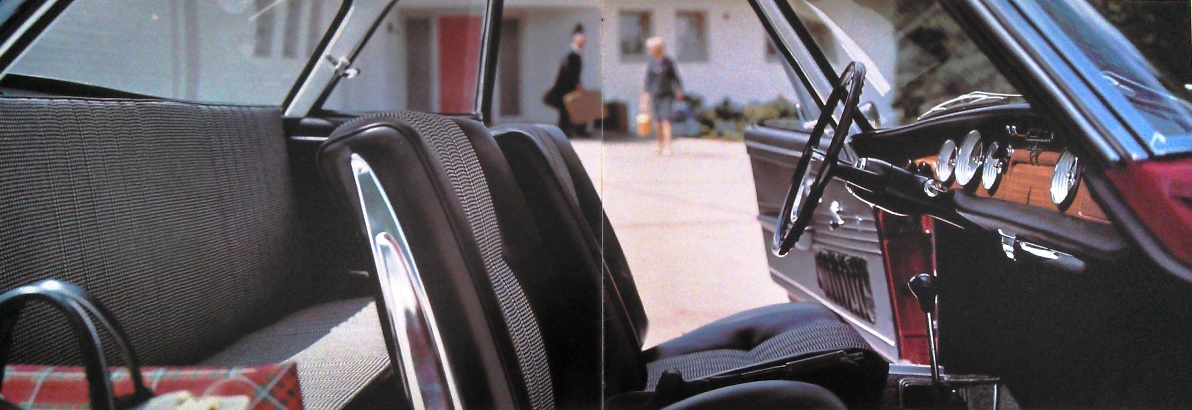 So when I saw that Carsten Klein in Germany was offering an original herringbone seat set it was an easy decision to buy it for my 1968 interior. It was in very good condition with only minor staining on the rear seats and a few tiny tears in the cloth. It should make a huge improvement inside and keep things authentic. The interesting design of the herringbone cloth is that it's heat-seamed, something that would not be possible if I tried to restore the seats. 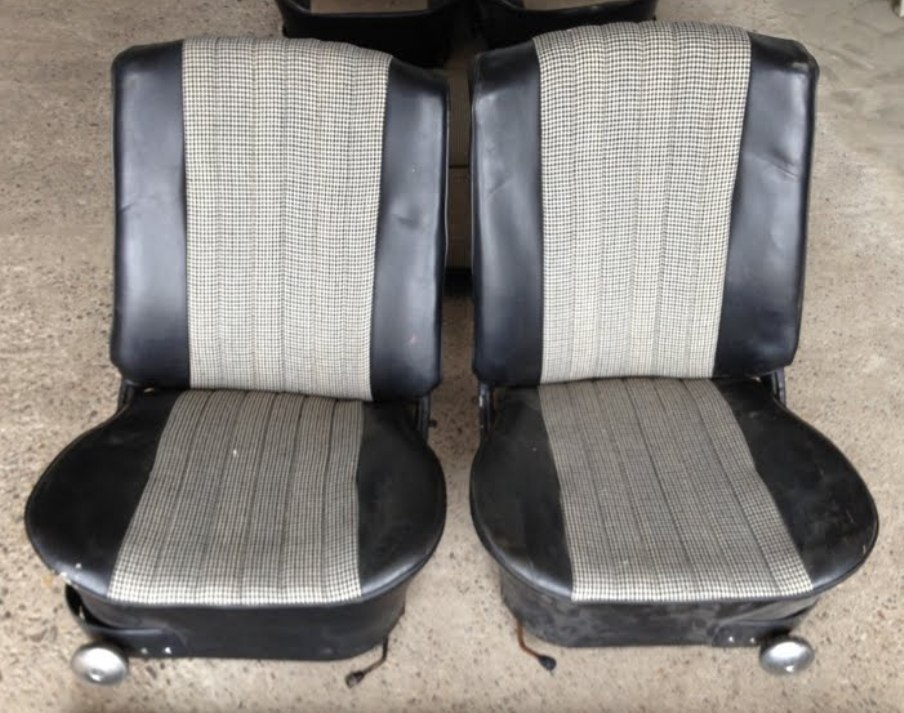 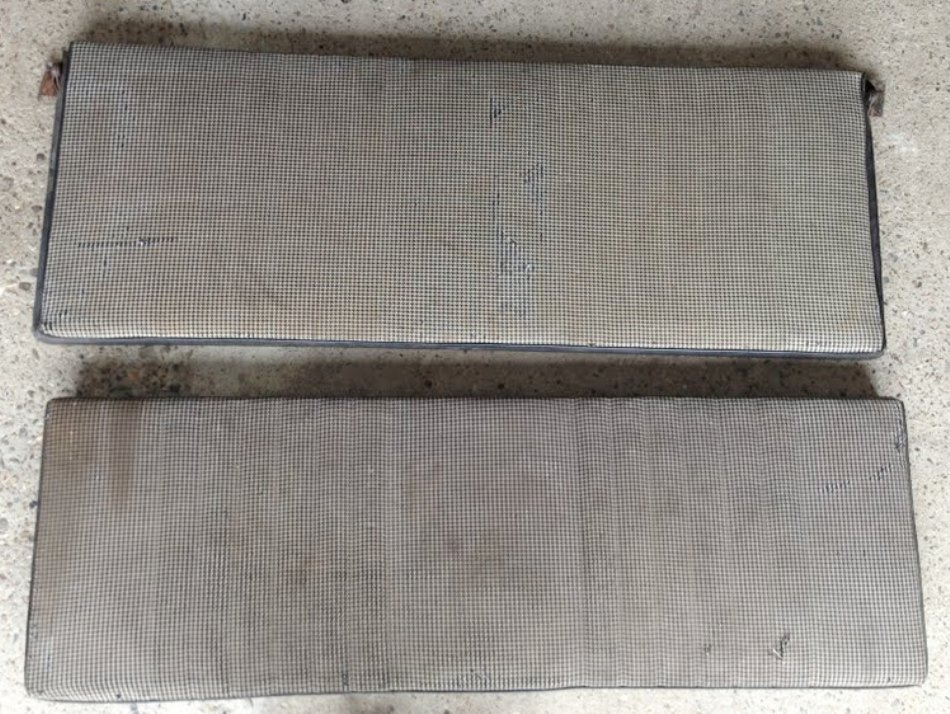 So when the seats are installed they should look something like this (from Steve Seaton's 1967 Coupe in Washington State). 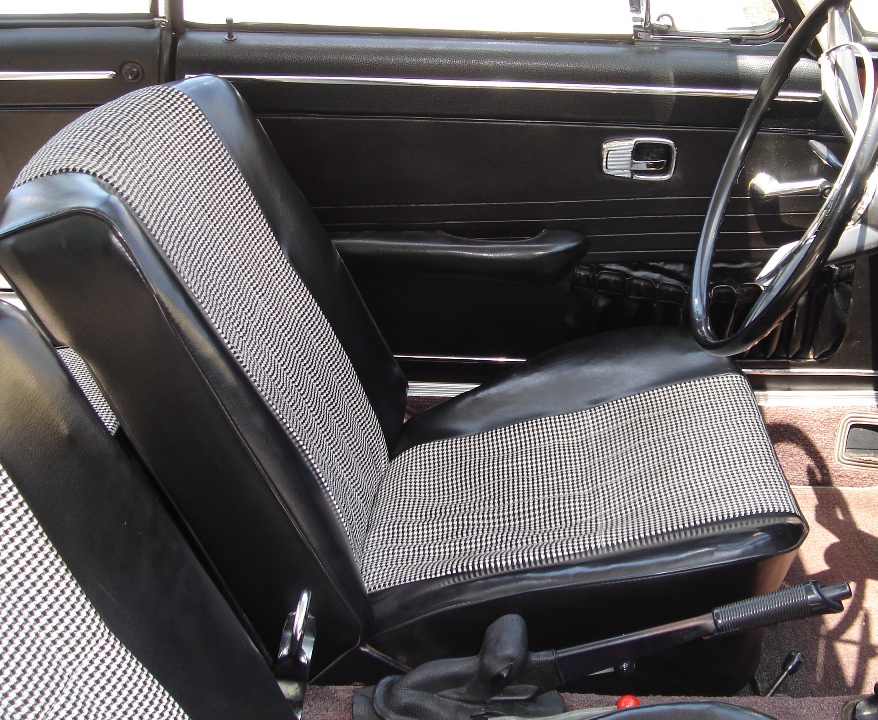 |
|
|
|
Post by Lee Hedges on Jul 6, 2013 16:20:55 GMT -8
|
|
|
|
Post by Lee Hedges on Jul 7, 2013 8:11:01 GMT -8
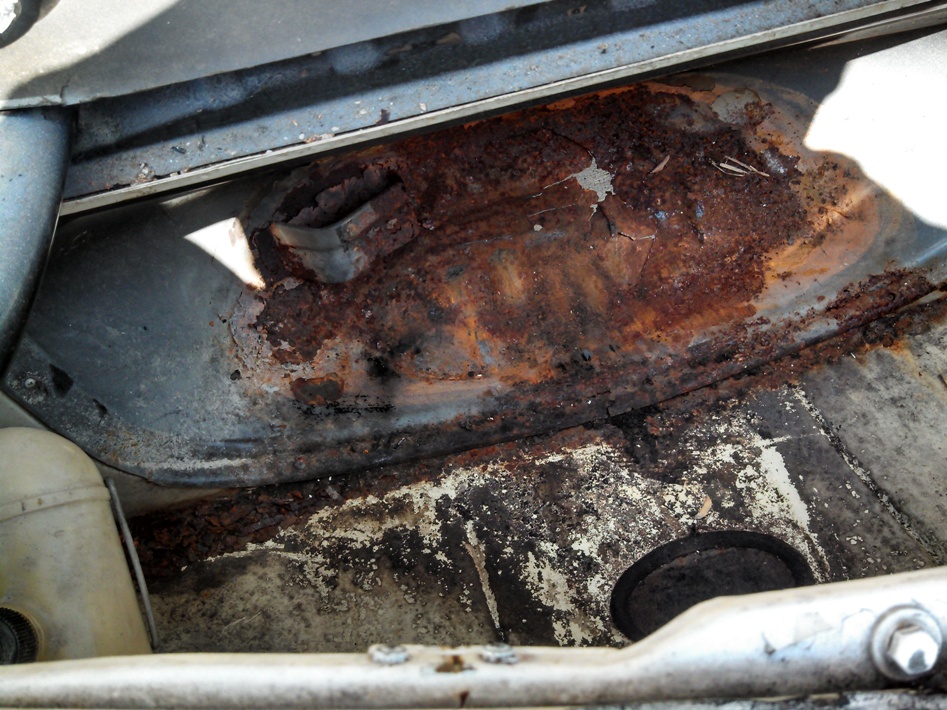
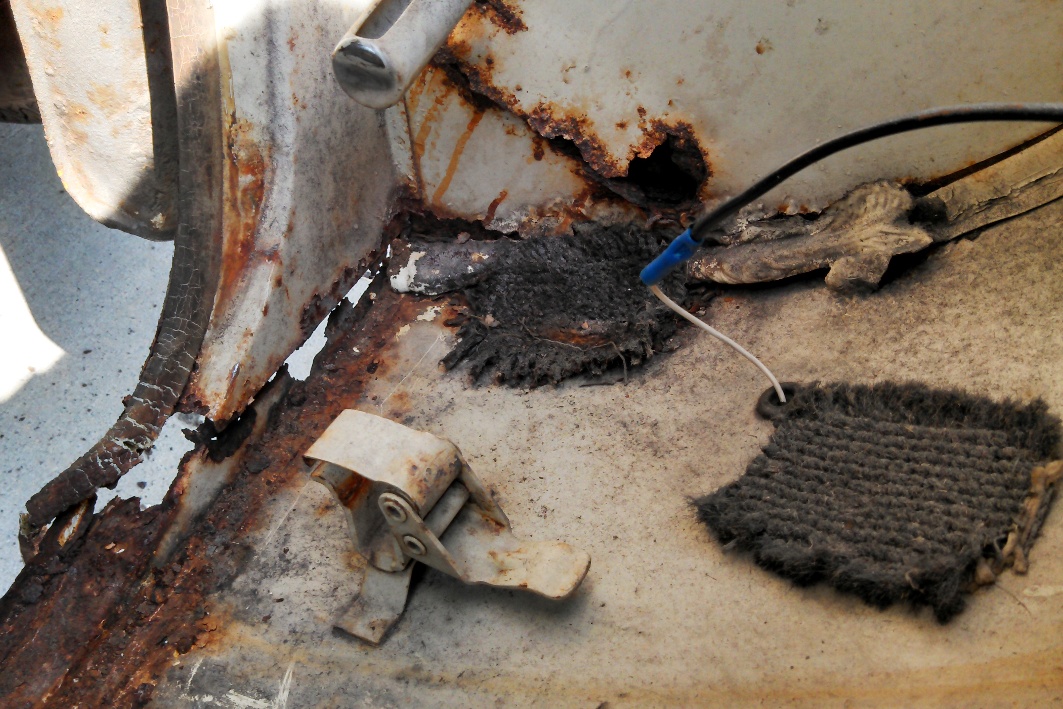
Now that I've exposed the rusty areas in the spare tire area it was time to halt the progress of the rust until I can get it properly repaired. First I used a metal brush to remove the loose flaking rust with a vacuum to remove all the dust. Then I chose a rust converter product called "NAPA Rust Dissolver Gel". It uses Phosphoric Acid to convert existing rust into a moisture-free black protective coating, eliminates the existing rust & seals out moisture to prevent the possibility of future rust formation & corrosion. I added the $10 bottle of pink rust converter gel into a spray bottle to more easily apply it to the areas then used a metal brush to get the chemical into the nooks & crannies of the rusty areas. After an hour the red color is transformed into a black surface and the next day it's dry & hard. 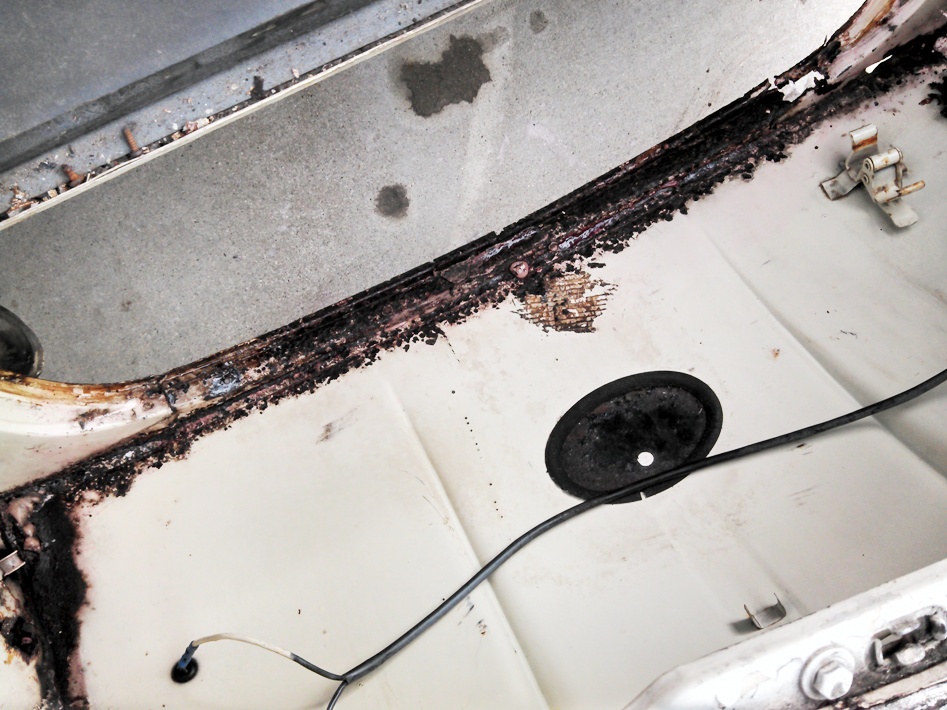 |
|
|
|
Post by Lee Hedges on Jul 7, 2013 8:37:16 GMT -8
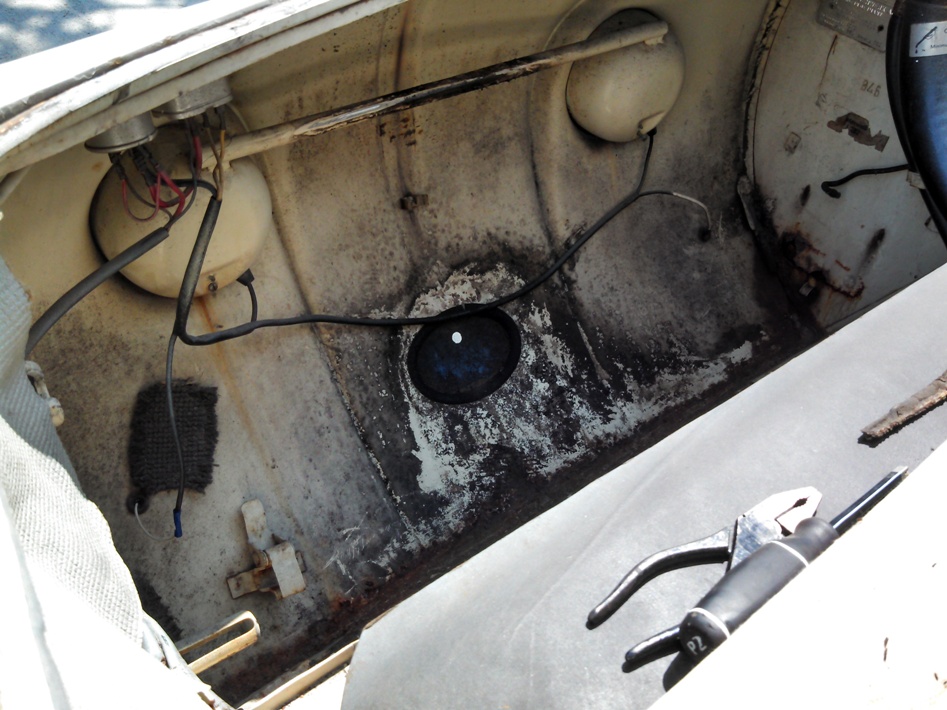
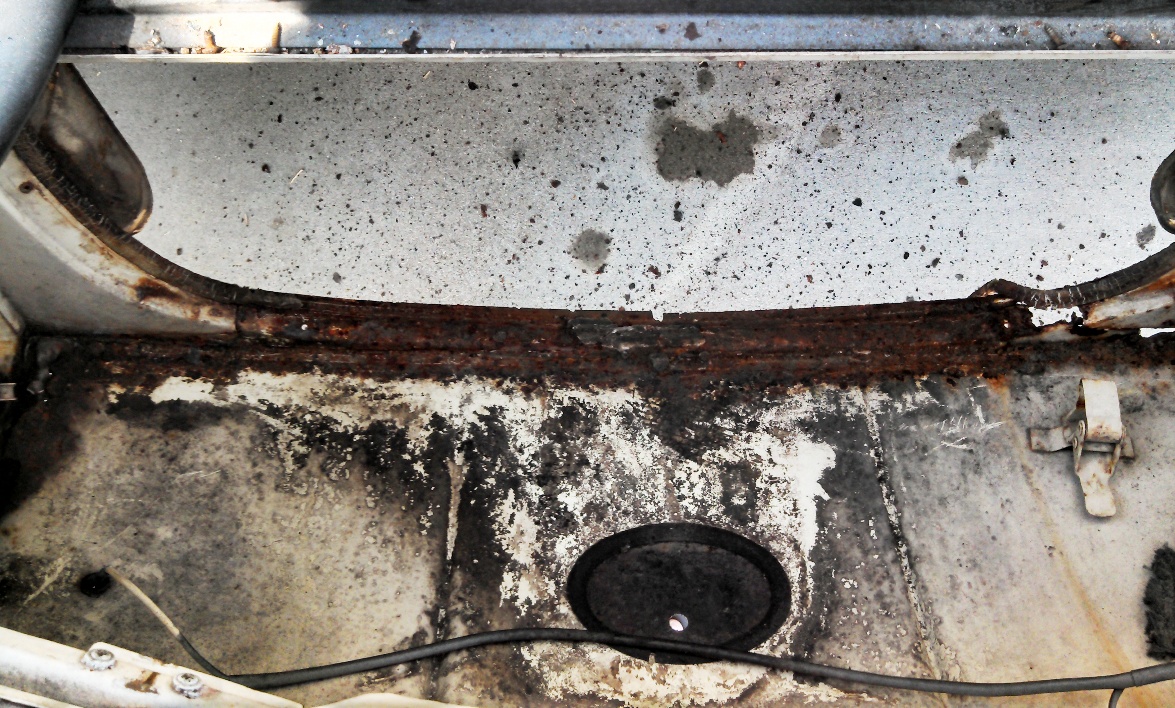
I knew there was also some rust in the floorpan areas, so I removed the front driver's seat and vacuumed the years of debris away. What I saw were the tarboard panels sitting over the floorpans with red rust dust underneath (below). 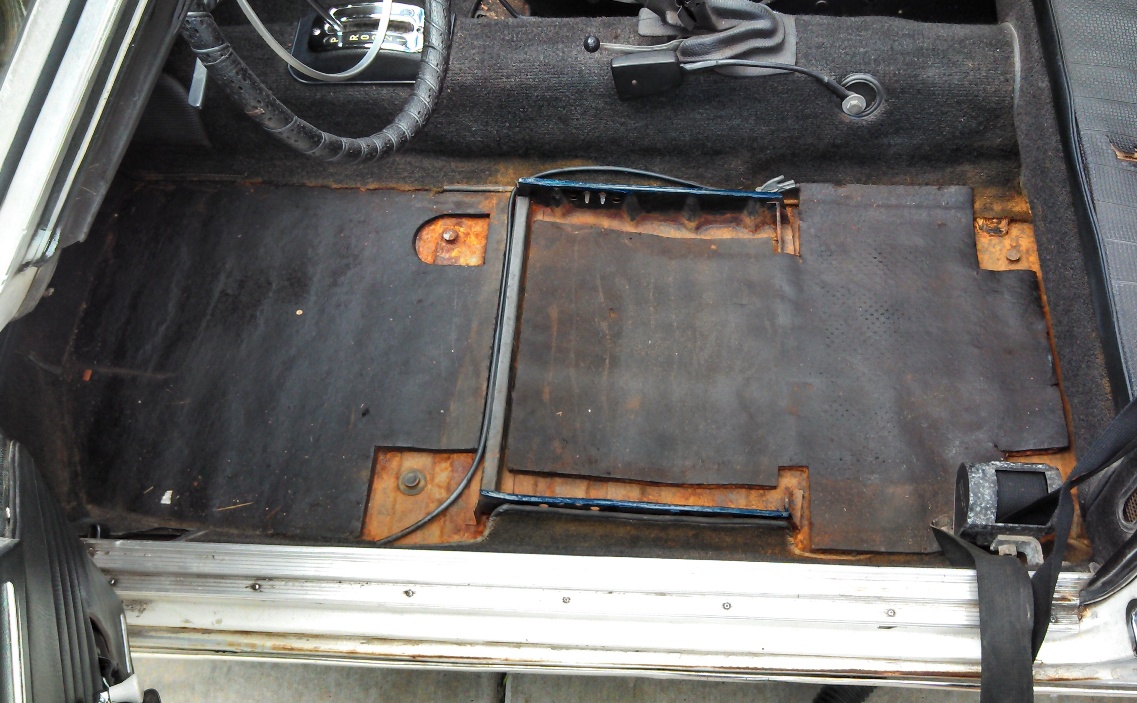 When the tarboards were removed the rust was flaking in the channels of the floorpan. More brushing & vacuuming to remove the majority of the rust. Then application of the rust converter gel & brushing into every area of the floorpan. 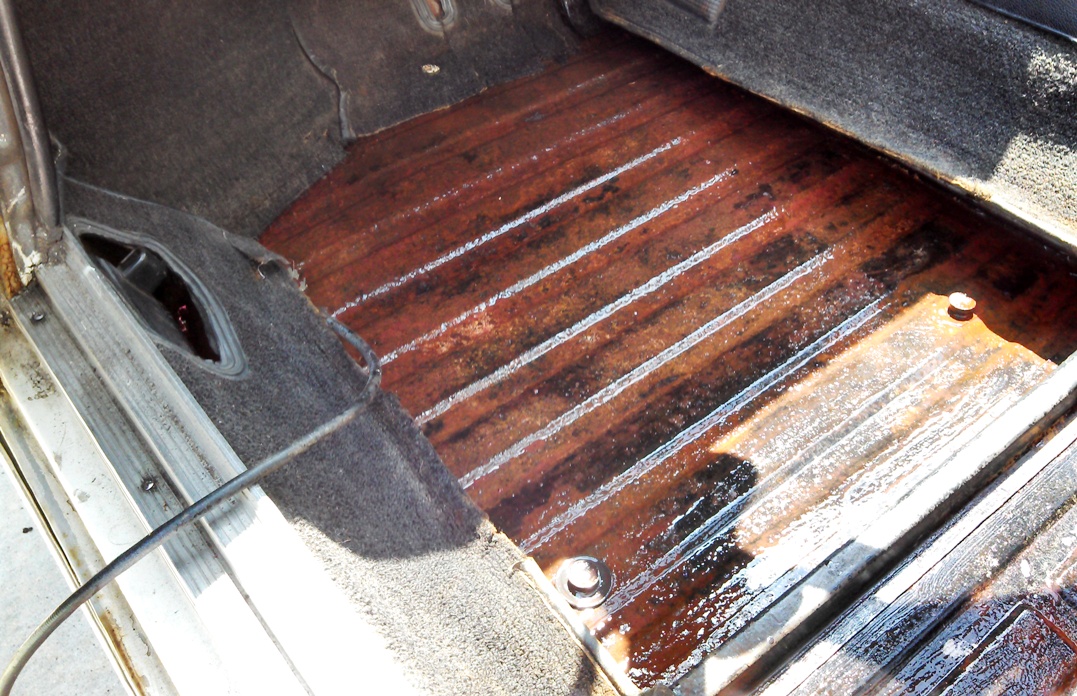 Then after sitting for an hour the rust changed to black. 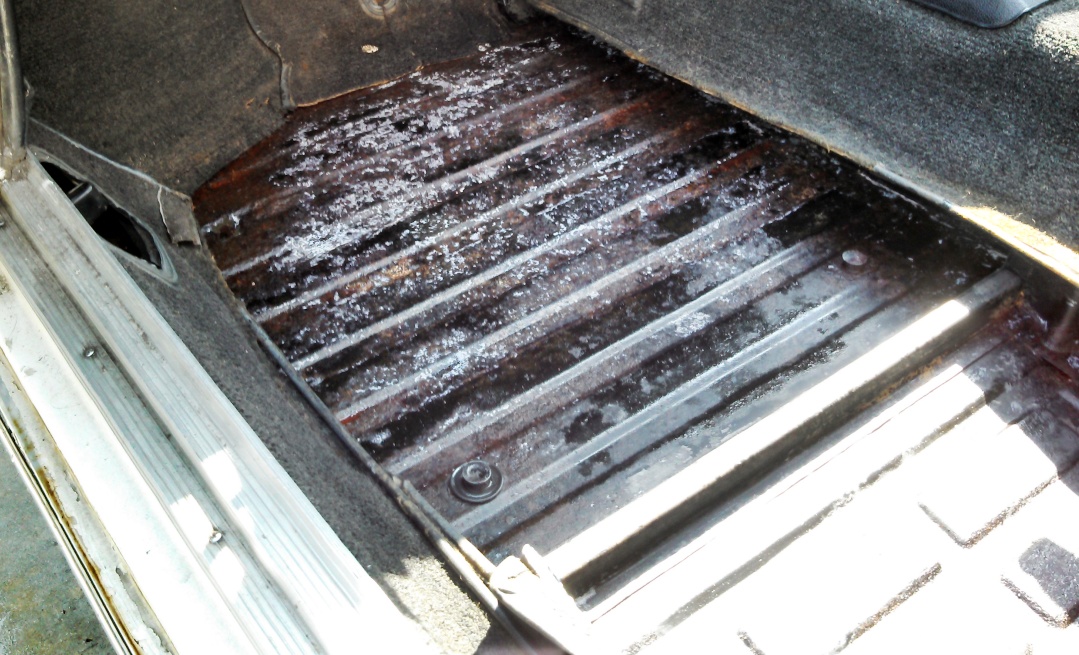 And after sitting overnight the floorpan is dry, solid, and protected. 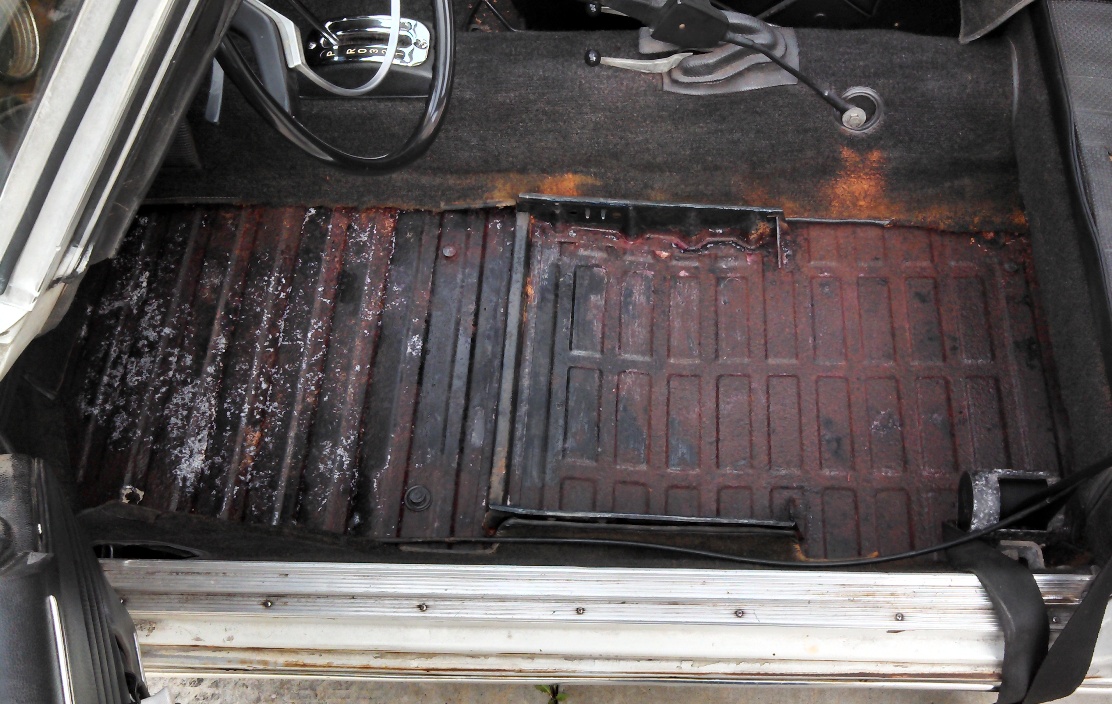 Next will be to apply either POR-15 or primer & paint to keep things from getting worse until I can get the floorpan sections replaced. |
|
|
|
Post by Jack Fisher on Jul 7, 2013 8:49:57 GMT -8
|
|
|
|
Post by Lee Hedges on Jul 7, 2013 12:17:18 GMT -8
Thanks for the great tip, Jack! I primed & painted the floorpan black today just to get it covered. I've got a can of POR-15 that I had planned for another T34, so I'll likely give that a try on another weekend. Typical for most T34s in America, my 1968 came to me with "personalized electrical enhancements" and two broken plastic mounting tabs on the 12-fuse box. 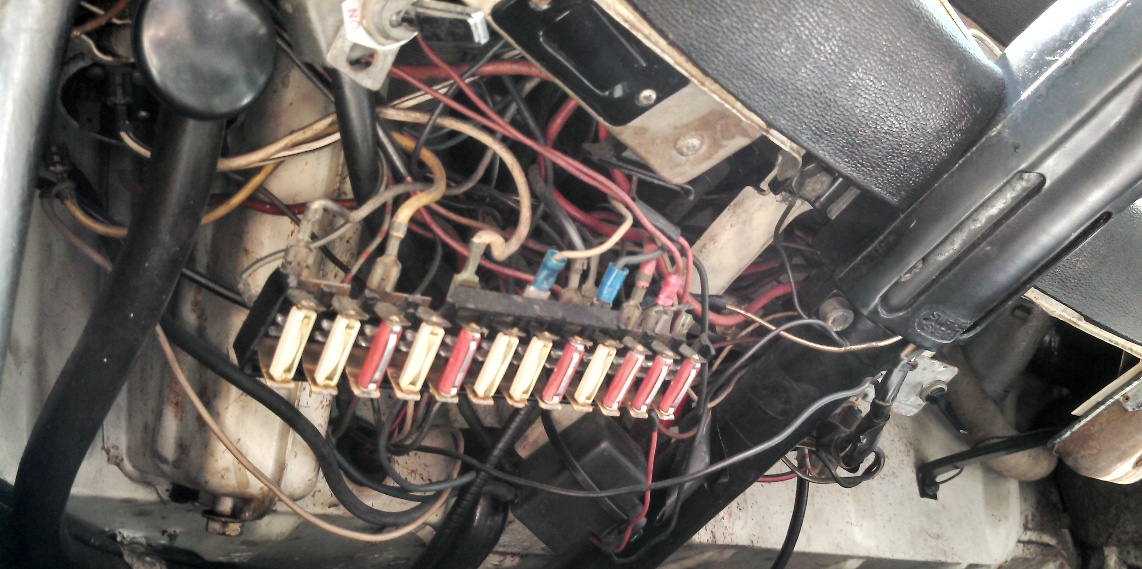 I'd found an original T34 12-fuse box (different than the T3 version) in my stash and had spent an evening sanding-down the electrical tabs for good contacts (below). What I didn't consider was this American T34 fuse box would not have the headlight parking lights on fuse #1. And since my T34 was a German-spec one, the headlight parking lights, license lights, and left rear parking light wires now had no place to plug into the fuse box. I've got to find a multi-plug adapter for fuse #2 to put the three wires onto. 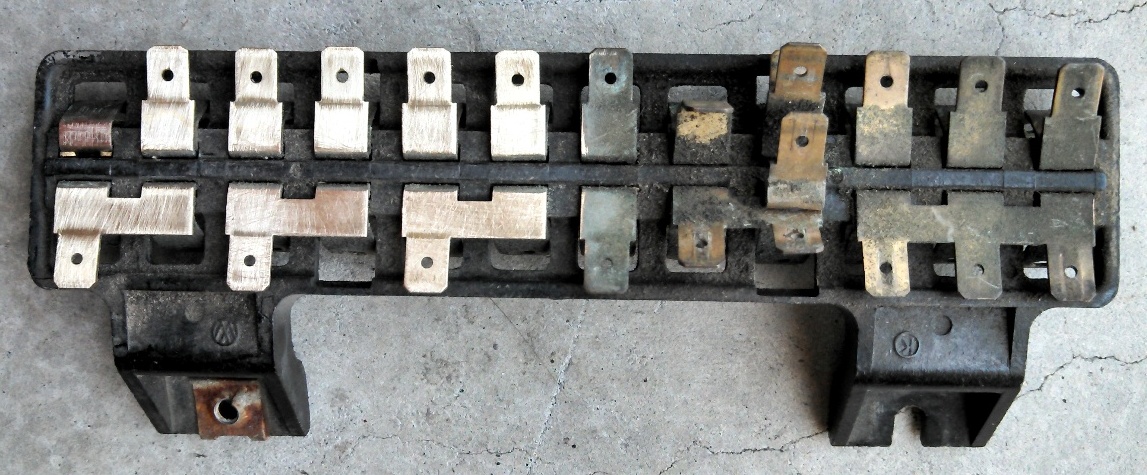 Then I found the wiring diagram on the T34 World site as well as the fuse box diagram in the 1968 owner's manual, scanned the parts and put them into a document for use inside the T34. When I was under the fuse box (sitting on my arse on the driveway with the door wide open) I could easily see what "personalization" had been done by the previous owners. Several wires had been spliced into the fuse box for various ground contacts, an electric windshield wiper squirter pump & switch, and even a replacement (non-stock) electric sunroof switch. Ugh! I hate wiring too. 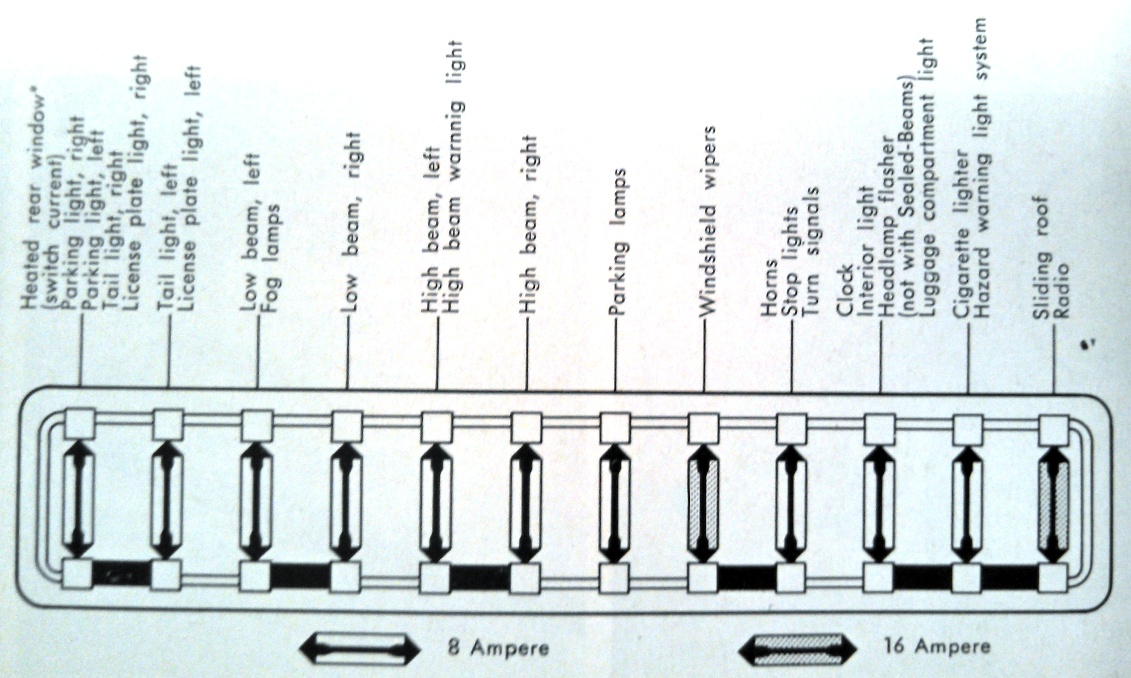 So Sunday morning I got up early and by 9am was working under the wires coming into the old fuse box. I used painter's blue tape to mark the positions for each wire then pulled them off the old box. Once they were all off I replaced the wires in-order onto the new box. Then I used the fuse box diagram to confirm that each wire was going to the right location. Any strange wires were tracked-down and removed if not stock. When it was all finished I added the clear fuse box cover and tested all the electrical items. 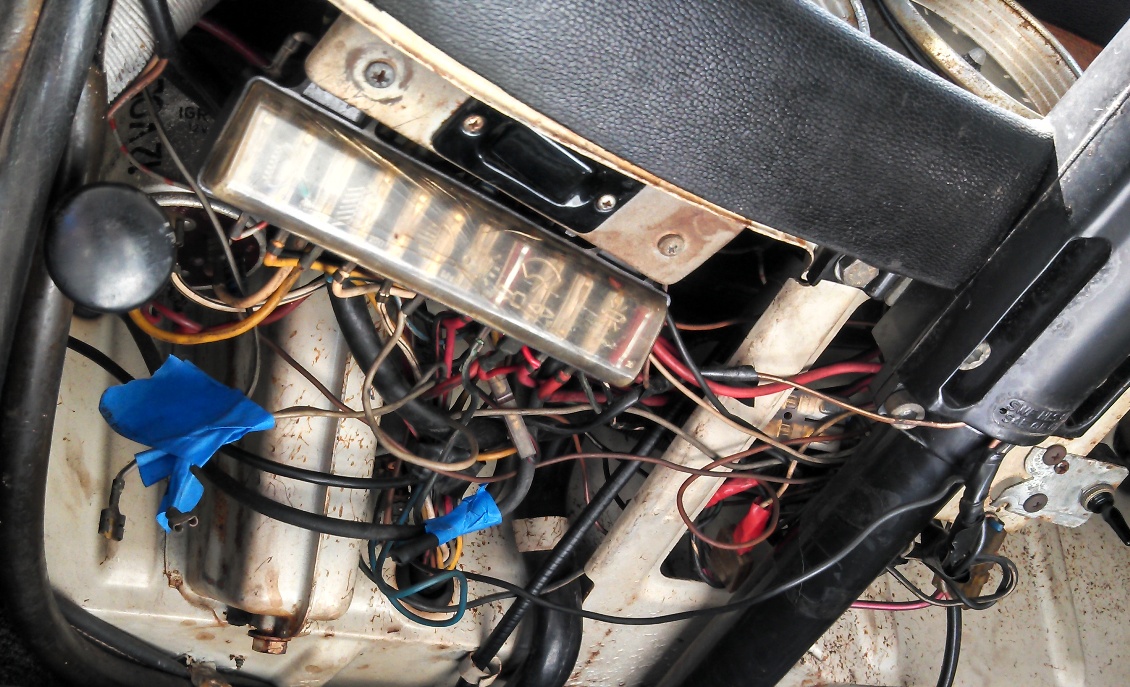 The original electric sunroof switch was missing, replaced with an aftermarket paddle switch & different metal mount. When the T34 was first delivered home I tested this switch but the sunroof didn't work. With a partial sunroof cable in the front compartment I feared that the sunroof was broken and the previous owners were unable to source the cables. I figured I'd get to that when it became a priority. So when I was checking out the switch I noticed that the thick red power wire was not connected to the switch from behind. So I connected it and immediately tested the switch ... EUREKA! The sunroof made a noise but didn't move far. So I lubricated the sunroof channel guides and slowly worked the sunroof open & closed to get the lubrication applied. And then all of a sudden the sunroof gained full-power and opened & closed quickly! Problem solved! Now I just need to buy a replacement sunroof switch to return it to stock. Mark Poulton says the BMW E9 electric door window switch is an exact replacement, for US$36 shipped. I'm one happy camper at this point ... Check out the video of it working, allowing the San Diego sunshine in! Replacing the fuse box & fuses, tightening ground connections, and removing old wires was the key to getting the sunroof working again. www.leehedges.com/t34/hedges345auto/07jul13sunroofworks.aviwww.leehedges.com/t34/hedges345auto/07jul13sunroofworks2.avi |
|
|
|
Post by Lee Hedges on Jul 7, 2013 15:46:58 GMT -8
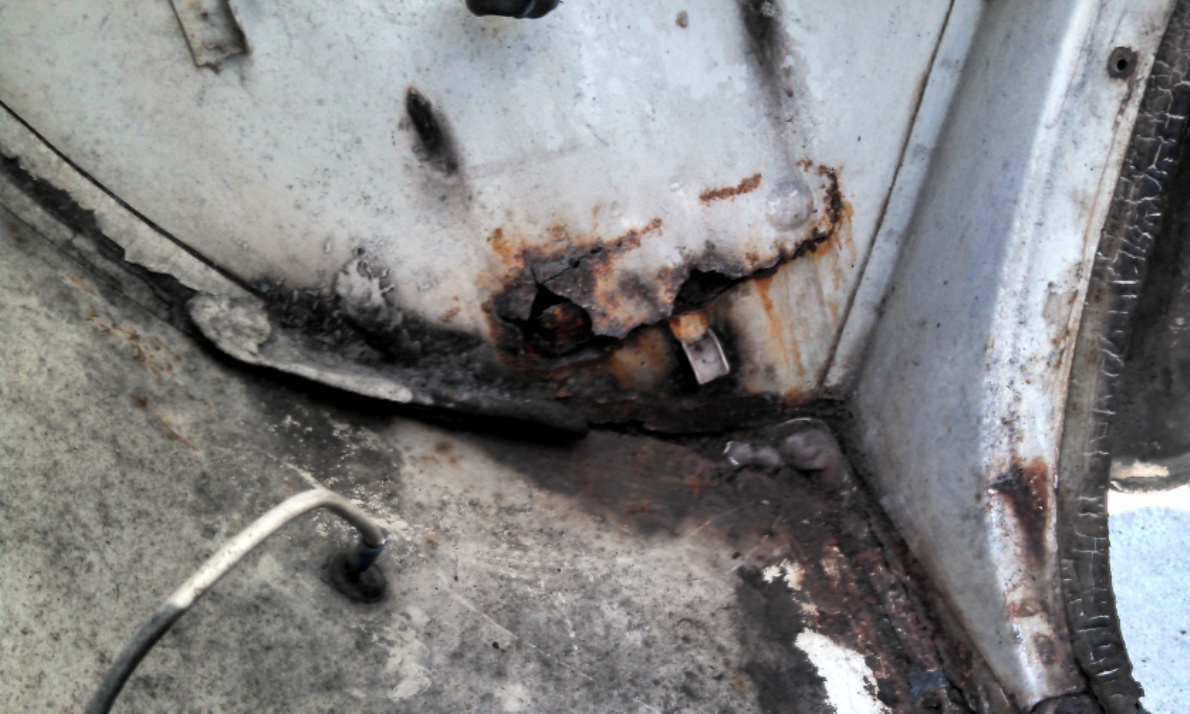
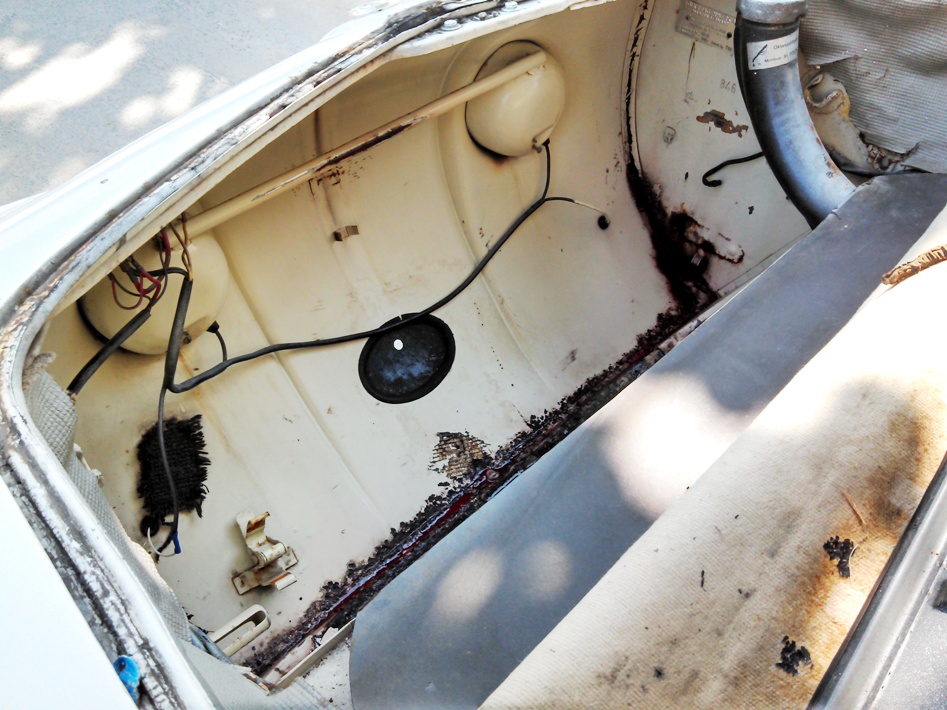
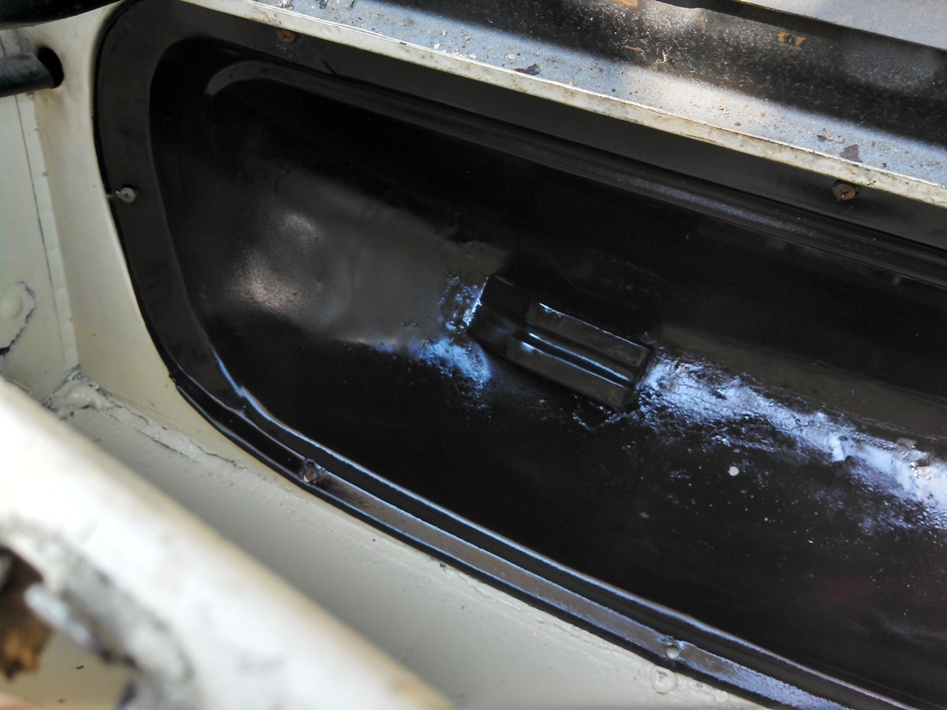
The spare tire well on the 1968 is too far rusted-through to be salvaged as-is. It'll require someone with welding skills to bring it back. At the VW Classic this year I was very lucky to take delivery of a nice original spare wheel well from Bata Mataja who had parted-out 1965 & 1968 T34s recently. 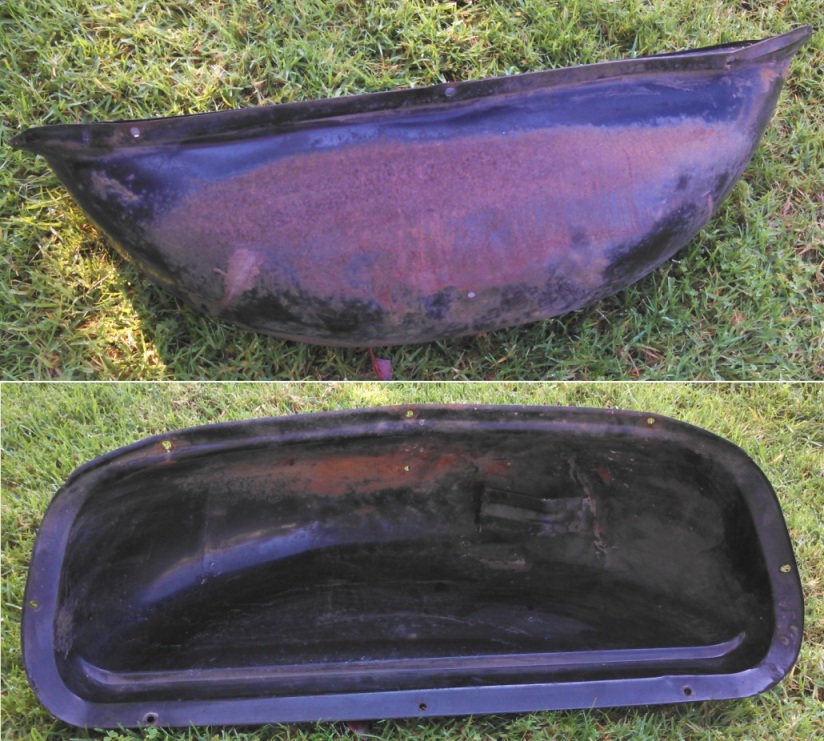 The well had rust on the inside & outside but no hole and no rust through. Just the typical dents & scrapes. So I sanded down the rusty areas to bare metal, applied the rust converter gel to halt any further rust. A few hours later I primed & painted it black. Then I placed it into the 1968's spare tire area to dry for a few days. Nice to have that gaping hole filled again with a decent well. I'll have the dents repaired when the bodywork is done. Thanks, Bata! 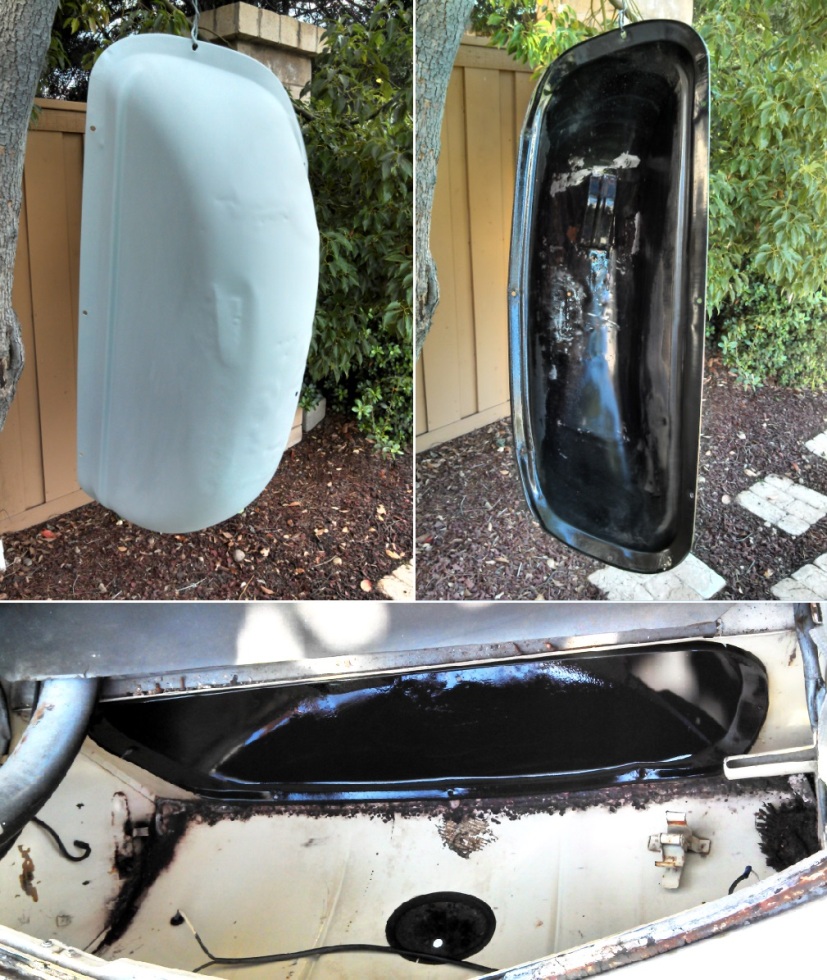 |
|
|
|
Post by Lee Hedges on Jul 8, 2013 15:51:22 GMT -8
|
|
|
|
Post by Lee Hedges on Jul 8, 2013 17:16:39 GMT -8
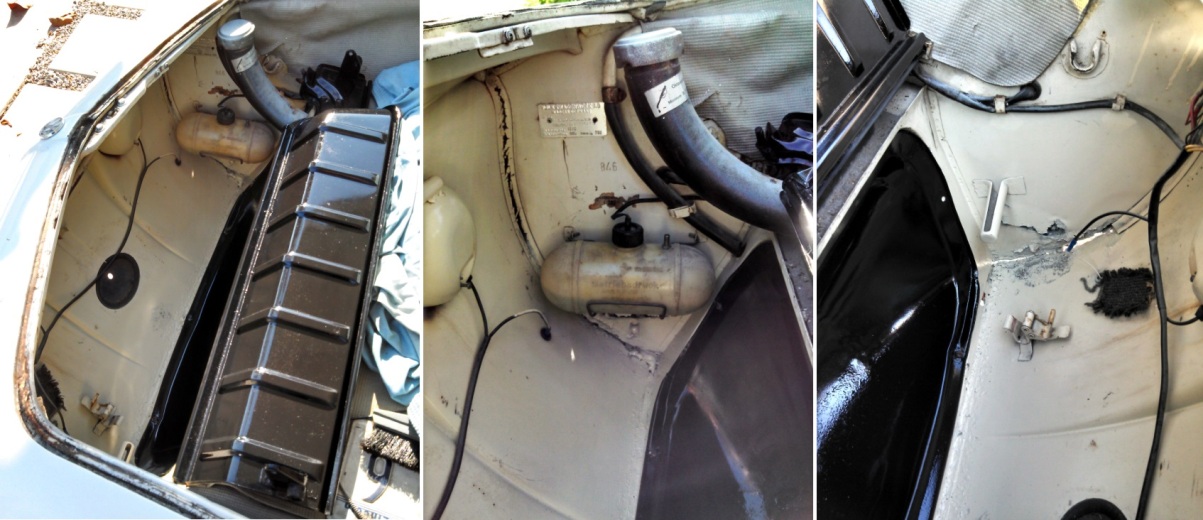
Now that the spare tire area is cleaned-up I decided to dive into the dash cover. The wood-grain cover on my 1968 was completely cracked & unable to be salvaged. So the temporary fix was to strip the dash components and install an adhesive wood-grained laminate. So I removed the gauges & switches and pulled-off the pieces of dash covering. Here's how it looks without the cover. 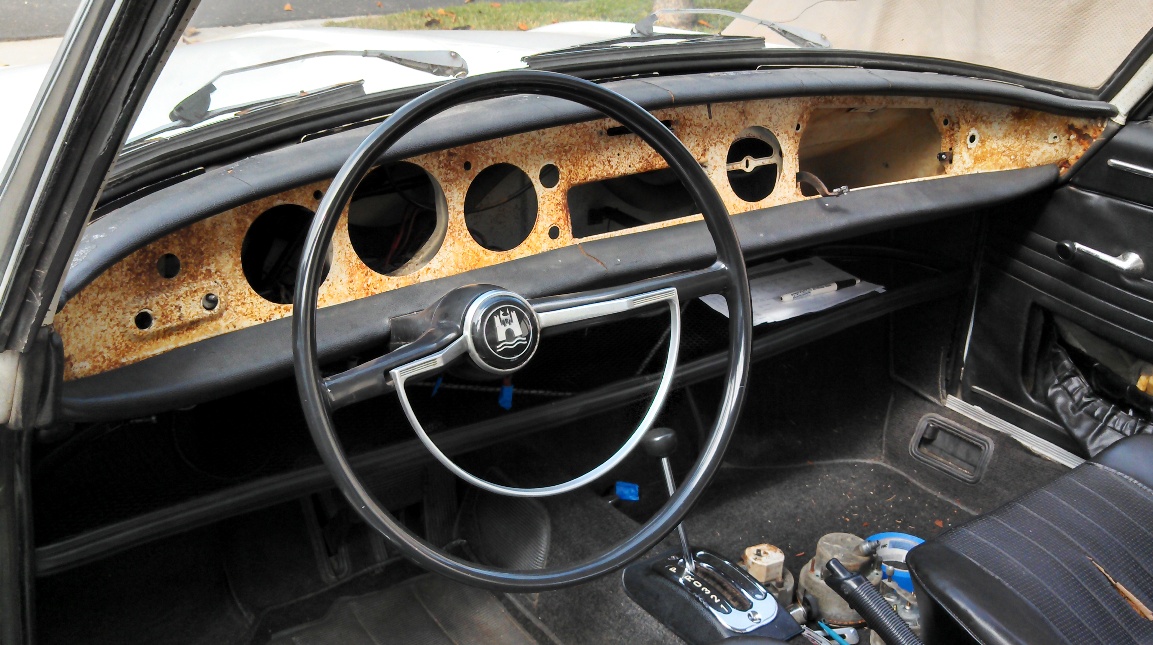 First thing I noticed was the large number of holes in the dash. My 1968 didn't come with the electrically-heated rear window (hole between speedo & clock) nor the dual-circuit brake warning light (hole above lights & wiper switches). But these holes were pre-stamped into the dash and simply covered-up if not used. Once the old cover was stripped I created a paper template for the new cover. Working in the 70F air-conditioned house is much better than the 95F San Diego heat. I've found that making a template also allows other T34 owners to quickly get a copy when they need it. I traced the template onto the new wood-grain contact paper and cut it out. One $7 roll can easily do 20+ T34 dashes. 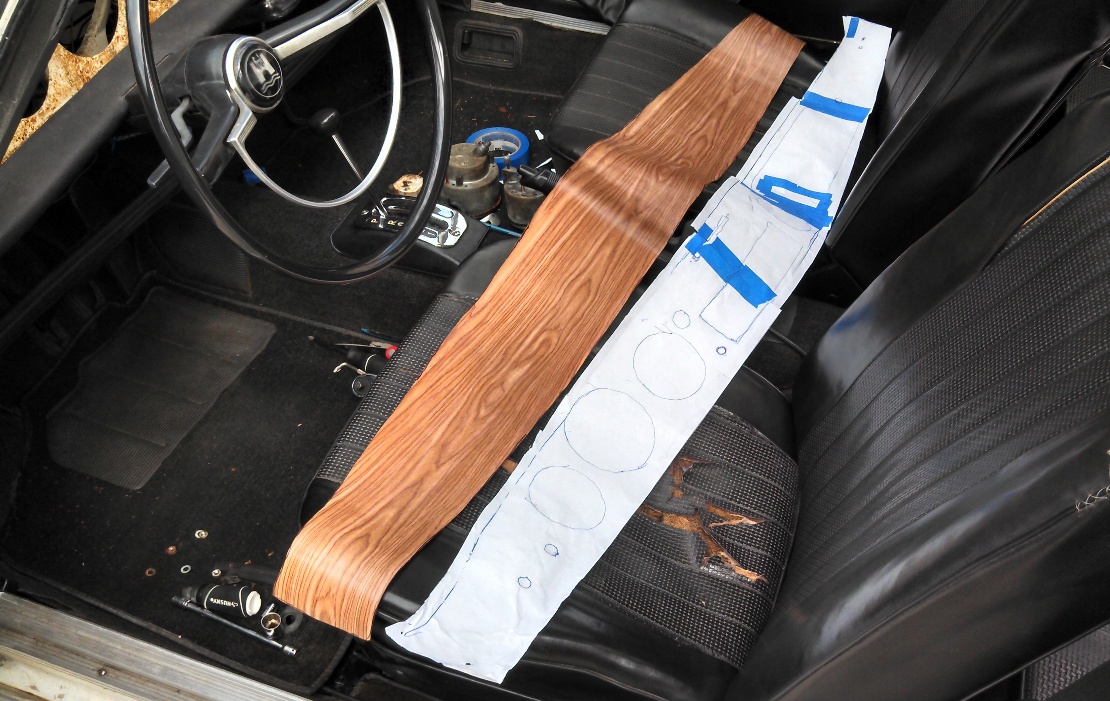 Prior to installing the new cover I needed to sand off the 45 year old spray adhesive on the dash. This was easy but also messy. 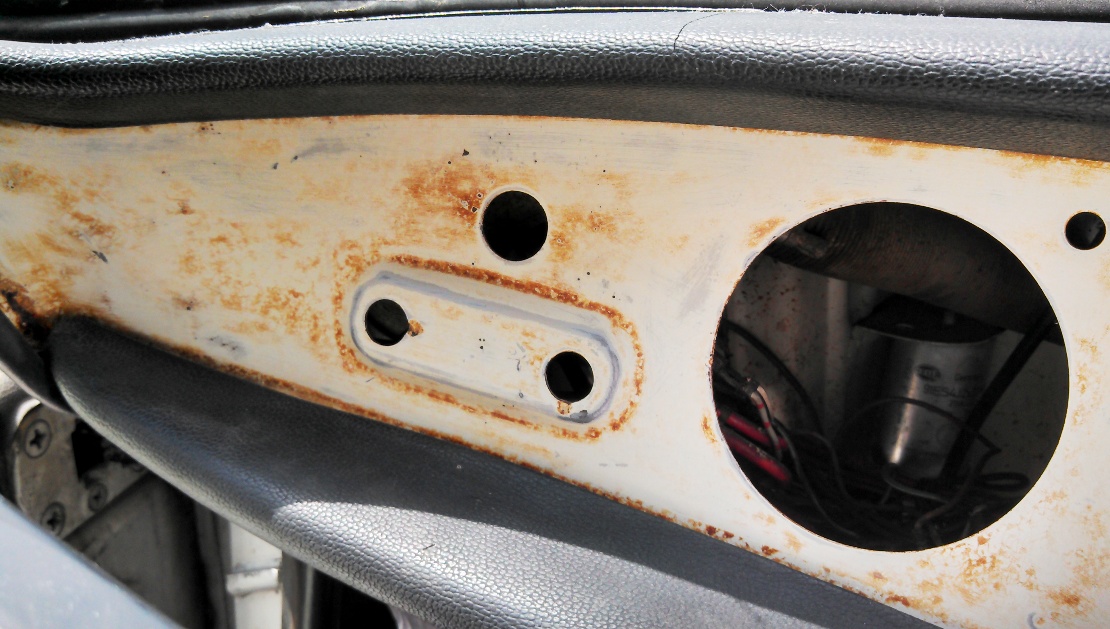 Then I installed the adhesive cover, starting at the right side corner by pulling back 5" off the cover and applying it smoothly to avoid air bubbles. It's nice that you can pull-up the cover if you make a mistake and reposition it easily. An hour later the entire cover was in-place. Then came the time-consuming process of cutting the openings for the dash components. Another hour later it was all finished. I replaced the small KG dash script & the dash knob covers (since the icons had lost their white paint) with new ones which really gave the dash a "new" appearance. Overall it was a very worthwhile job as a temporary fix until the T34 gets a full restoration. 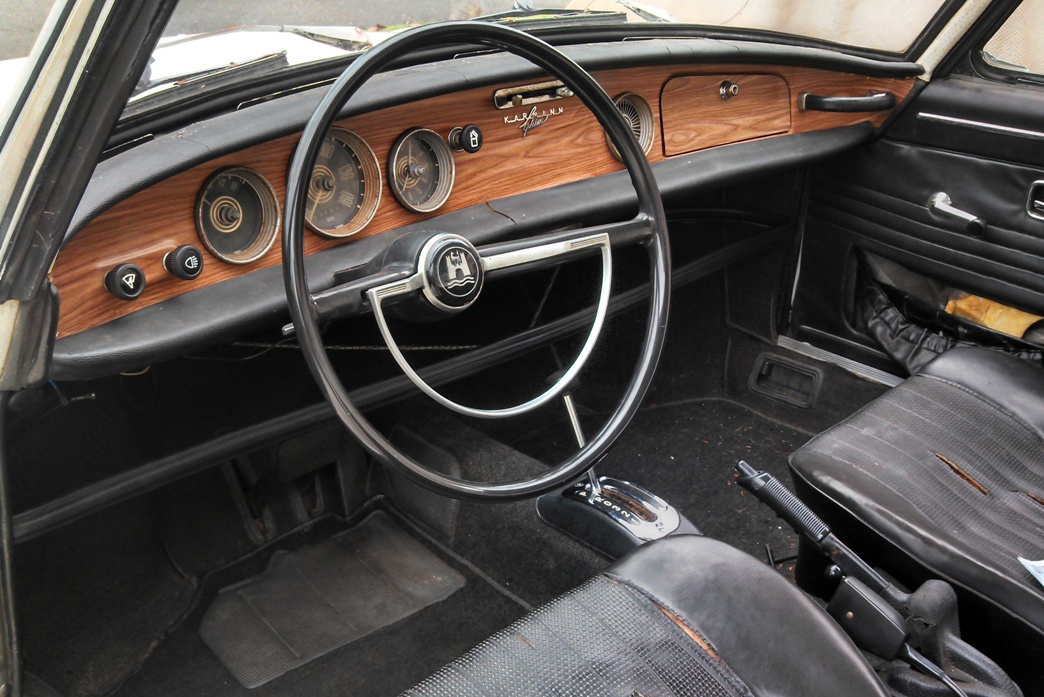 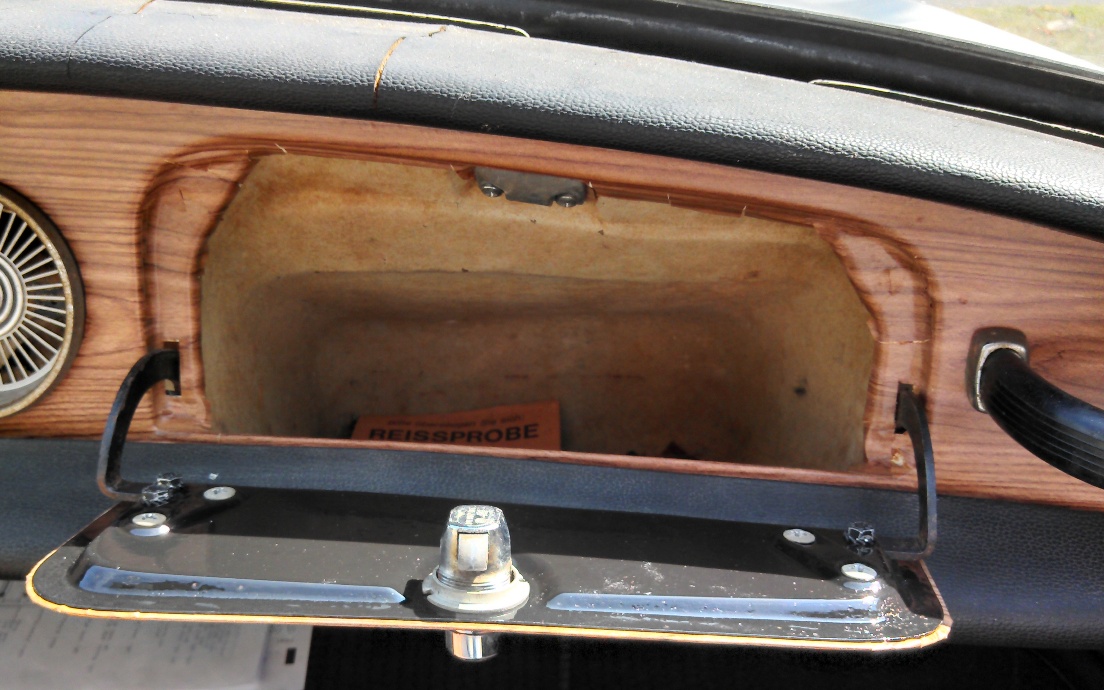 |
|
|
|
Post by Lee Hedges on Jul 10, 2013 19:19:00 GMT -8
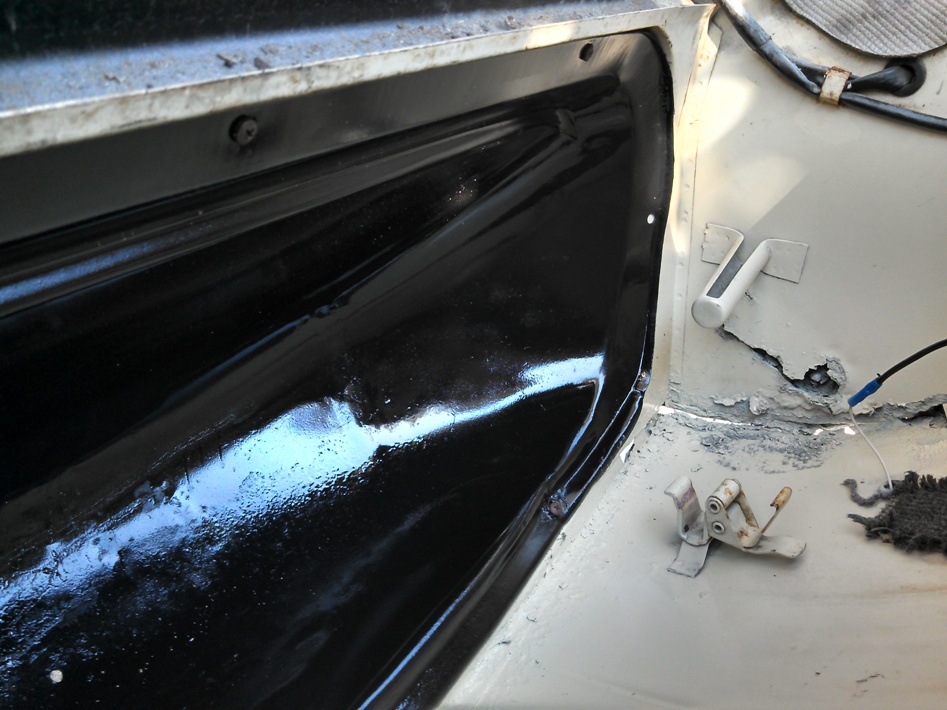
During the initial inspection process I did when the 1968 arrived I noticed several "personalized" electrical items that had been added by the previous owner. An electric wiper washer pump & switch, a couple hand-made ground wires, and a strange toggle switch mounted to the sunroof switch metal plate. The original sunroof switch was missing, bummer. So in discussions with Mark Poulton about a replacement electric sunroof switch (not an easy thing to find), he mentioned that the 1968-71 BMW E9 Coupe (which was built at the Karmann factory during the same time as the T34) used the same switch but it was used for the electric door window switches. So I searched ebay for it and there it was, a new electric sunroof switch with a chrome surround and black paddle switch for $30. Done deal! The switch arrived today and the installation was pretty straightforward. There are three thick-gauge red wires going to the switch: red & black wire going to the 83y outer pole, solid red power going to the 83R center, and solid red to the 83z opposite pole. I popped the switch into the metal plate and tested it. Works great!  |
|
|
|
Post by David Herold on Jul 11, 2013 5:25:47 GMT -8
the switch looks great
|
|
|
|
Post by Lee Hedges on Jul 27, 2013 18:49:47 GMT -8
|
|
|
|
Post by Lee Hedges on Nov 14, 2013 17:04:08 GMT -8
The original 1968 seat set from Carsten Klein in Germany was delivered today! This set has the cloth houndstooth pattern with black vinyl on the outer edges. It really brightens-up the otherwise very dark black interior that my 1968 had originally.   |
|
|
|
Post by Paul Peeters on Nov 16, 2013 0:34:06 GMT -8
Those seats look good Lee! It really is nice to see how this car is improved step-by-step. Keep posting updates, this topic will interest all T34-owners.
|
|